|


 Unicorned
CopyNES: The Magical Giver of Game Life Unicorned
CopyNES: The Magical Giver of Game Life
In 1997, Kevin
Horton designed the first ever NES back-up unit, dubbed CopyNES.
With CopyNES, and a little modification to a front loading Nintendo
system, users could copy NES and Famicom cartridges (with a Famicom-to-NES
adapter) and game saves via a computer's parallel port. Horton
used to sell kits that included all of the necessary parts for
$45. If you weren't technically inclined to do the install, $125
afforded you a complete conversion with a system you sent through
the mail. Somewhere around 2006, however, Horton stopped selling
and installing CopyNES kits.
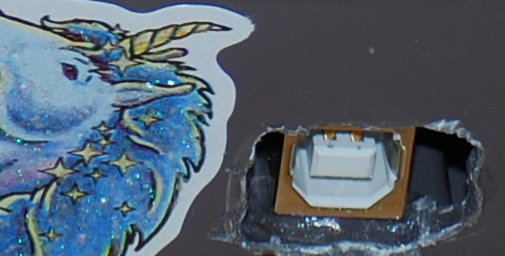
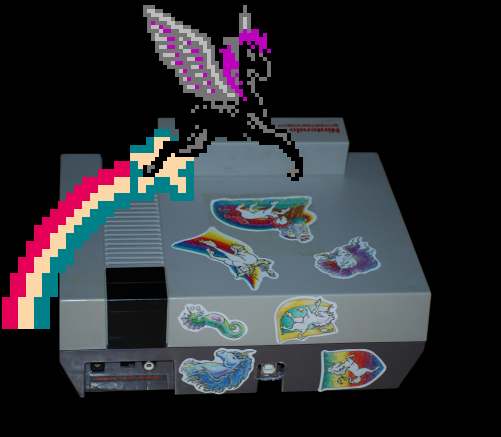
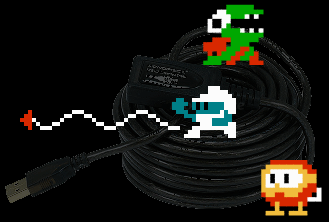
Holy
USB hole.
A decade later,
Brian Parker took the same basic concept of CopyNES and updated
it with USB connectivity. Currently the USB version of CopyNES
sells for $70 + shipping. Parker does not offer any installation
service.
This is unfortunate
because installing USB CopyNES is quite the task for those with
little or no experience with soldering and desoldering. The installation
process requires, among other things, the removal of the CPU from
the system. For those of you tech savvy enough, there is an installation
manual in .pdf format available to download:
 USB CopyNES Installation Manual
PDF—Technical instructions on installing USB CopyNES
written by Kevin Horton and Brian Parker.
USB CopyNES Installation Manual
PDF—Technical instructions on installing USB CopyNES
written by Kevin Horton and Brian Parker.
All of the
work involved is worth it in the end, because with USB CopyNES,
you can preserve all of your NES and Famicom prototypes and protect
them from the fate of bit rot. You can even re-flash the games
right back onto the physical copies to ensure another twenty years
of game playing!
For USB CopyNES
to communicate with a computer, you will need to download the
necessary software:
 USB CopyNES Host App Zip Version
4.0.1—The program required for running on the computer
after USB connected. Works on Windows 2000 and XP operating systems.
USB CopyNES Host App Zip Version
4.0.1—The program required for running on the computer
after USB connected. Works on Windows 2000 and XP operating systems.
When you're
finished downloading and unzipping the software, connect an A
Male to B Male USB cable into USB CopyNES and your PC or laptop.
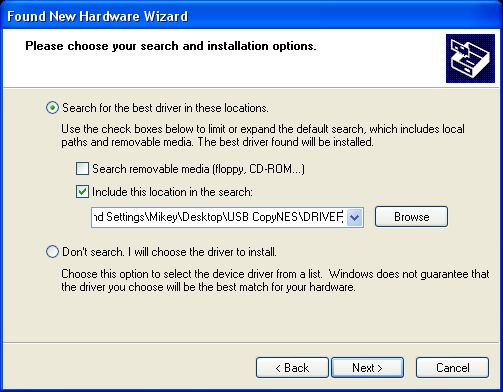
When prompted
by your computer to search for the driver in the Found New
Hardware window, click Browse and locate the folder
where you have unzipped the USB CopyNES Host App program. Hit
the Next button for the driver to begin installing.
Now try to
open USB CopyNES.exe. Make sure the NES is powered on.
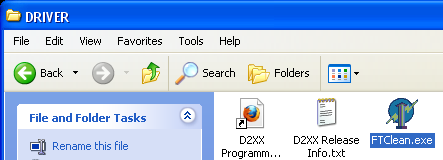
If for some
reason you receive error messages telling you that the NES is
off, when it is not, or if any other failed prompts come up, try
re-installing the drivers. First, find the DRIVER folder
in the USB CopyNES directory. Click on FTClean.exe
and run the program to clean the system.

Next, right-click
on My Computer, choose Properties, left-click on
the Hardware tab, and left-click on Device Manager.
Scroll down to Universal Serial Bus controllers ang go
down to USB Composite Device. Double click on it to make
sure it says CopyNES under Location. Click OK. Right-click
on the USB Composite Device and left-click Uninstall.
Unplug the
USB cable from your computer and plug it back in to attempt installation
again.
- Step 1:
Insert your prototype into CopyNES and push the power button.
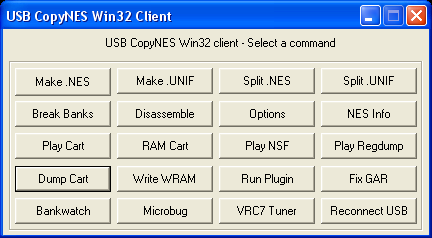
- Step 2:
Start USB CopyNES.exe.
- Step 3:
Choose Dump Cart.
- Step 4:
Surf to http://bootgod.dyndns.org:7777
and search for the title of the prototype that you're about to
back up.
- Step 5:
Locate the PCB board/mapper of the game on the site.
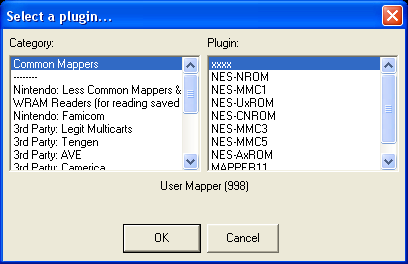
- Step 6:
Choose the corresponding PCB class/mapper on the USB CopyNES program
(the number in parenthesis represents the mapper). Click OK.
- Step 7:
Type in a name for your back-up. Click OK.
- Step 8:
Test the .NES file in your favorite emulator.
As an alternative
to Steps 4 and 5, you can also find out the correct mapper by
loading a ROM of the retail game you're looking to dump into an
NES emulator like FCEUX.
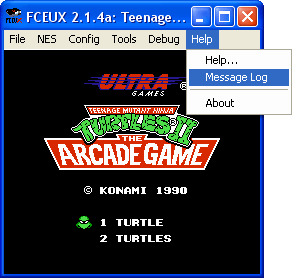
In FCEUX,
open the retail game's ROM. When the game begins, click on Help
and then Message Log.
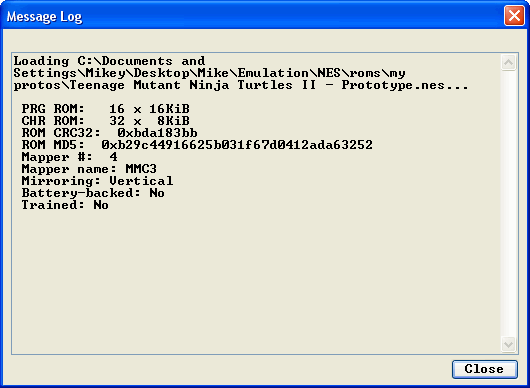
The retail
game's mapper number and name will be displayed in this list.
Use that number
and mapper name in CopyNES for a successful dump of your prototype.
Once you've
successfully copied the files onto your computer, it's time to
determine whether the prototype has any changes from the final
game. That's when GoodNES comes in. Follow the steps listed below to check to see if your NES prototype
dump is different from the retail and/or previously dumped prototypes.
- Step 1:
Go to www.allgoodthings.us
and download the latest GoodNES .zip file to the Desktop (at the
top of the page, click on Forum+Files -> Downloads
-> GoodNES)
- Step 2:
Extract the contents of the .zip file to a new folder called goodnes
- Step 3:
Copy and paste dumped .NES files into this newly created goodnes
folder
- Step 4:
In Windows, click on the Start button, choose Run,
type "cmd," and press ENTER to open Command
Prompt
- Step 5:
In Command Prompt, type "cd desktop/goodnes"
and press ENTER
- Step 6:
Type the command "goodnes list" and press ENTER
- Step 7:
In the goodnes folder, locate "NEShave.txt"
and double-click on it
- Step 8:
Any games not listed in this .txt file are currently not known,
and therefore, are new dumps
(Thanks to
Skrybe for his help with this!)
Note: Unplugging
the USB cable from USB CopyNES allows you to play games on the
system as usual.
Now let's go save some game worlds together!

|
